Wednesday, April 20, 2011

Earth Day - April 22

Image found here: sacramentoscoop.com [Graphic property of and courtesy of Environmental Council of Sacramento created by Dana Gray, a local Sacramento artist.]


Earthday.org


Green Cleaning

I like the thought of Earth Day being in Spring, it feels fitting to have a brand new vision for how to better our planet at the beginning of the season when things are bursting into growth and bloom.  it does us all good to sit and think about how our lives impact our planet.  We are not living in the caveman era when things like eating and cleaning only had a minimal impact on nature.  Now everything we purchase and consume affects the globe from an economic standpoint as well as health, and destruction of our natural resources. 

I love driving my car to work as much as the rest of you, but I live close enough I need to start biking some of these days to help cut gas, and exhaust etc. It's also beneficial for my health.  These are things that I'm working on changing in my life.  I'm working on the green cleaning, using baking soda and vinegar more than these other chemicals that pollute things. I've already been using a steam mop for my kitchen floor, although it still uses electricity, it's healthier for the air and my little doggies.

There are small changes that people can make, switching to the energy efficient light bulbs, drinking water from BPA free reusable containers and not buying bottled water, taking your own coffee container when purchasing coffee at a local coffee store, using the reusable bags when shopping, purchasing local organic foods, planting a garden to eat from etc.  There are many changes that can be made, focus on one or two and make them a part of your life, and next year find some other new things to incorporate into your life.


How to Green Your Kitchen Guide

Green Cleaning

Goclean.com

Go Green with Natural Cleaning Supplies

Long before going green became popular, Mary Findley dedicated her life to changing people's use of toxic chemicals. Years of cleaning homes professional and breathing toxic chemicals convinced Mary of the necessity to change our way of life. Some of the cleaners she used were not tolerated by her customers and her own throat and lungs soon showed issues after breathing the fumes for years on end. For her own health and that of her customers, Mary found healthy ways to clean, which set her on a course to change the way the world views cleaning.
Since writing her book "The Complete Idiot's Guide to Green Cleaning", Mary's eyes opened even wider to the various ways people could make small changes in their lifestyle that would slow the damage being done to Mother Earth. One person can make a difference especially when multiplied by even one million people - the numbers are staggering.
Mary's goal is for one million people to sign up to be a Moppins Greener Cleaner and make the suggested small changes in their life for the sake of Mother Earth and themselves. Sign up now and receive Mary's free article called "The Hit List" which states the worst toxic cleaners commonly found in our products, the health issues they cause and where you find them. In addition Mary will send you her "Totally Green Home." This is a simple step by step method to help you convert you home to green living. You will also receive Mary's monthly newsletter and be privy to special discounts. 

Earth Day Inspires Eco-friendly Changes

Realsimple.com What Eco Friendly Changes Have You Made In Your Life

Tuesday, April 19, 2011

Yoga in the Park, virgin visit!

There is a movement out here called Yoga in the Park, I heard of it through a co-worker who read it in the paper.  You know the story.  I thought about it last summer, and I was to nervous to go, and then the rains came, and who goes out and does yoga in the mud?  I'm not a dirt kind of girl, trust me.  It seems that I need to learn the names of the different types of yoga in order to speak clearly with yoga enthusiasts.   I apologize right now, I'm a beginner. My beginner status shone brightly on this yoga session as well.  The very nice instructor did say that we needed to respect where we were at, and to go into childspose as needed, in order to catch our breathe re-group, and then to jump back in.  I only took her at her word.  It seems that I was the first to break rank, because the firs time I huddled into childpose, she mentioned to the whole group to do the same if they needed to take a moment to breathe.  Yep, in front of 130 people I'm the one breaking rank first. It would have been more embarrassing, but I really needed to breathe. There were so many downward dog, and then the plank into something that looked like this.

 These were other poses we did.  The warrior pose is where the assistant came over to assist me.

Let me give you a bit of history, I love to dance, but I'm one who trips over their own feet in normal walking situations.  I run into walls if I walk to fast, it's been a clumsy life.  I'm not complaining, I'm just setting the stage, beginner Yogi in the middle of many skinnier bendier more established yogi's and here I am throwing myself into the posses with full abandon.  I'm sure it was quite a site.  The look on the assistants face said enough of that to me, she smiled gently but it seemed that it was because she was unable to hide the giggle that wanted to burst out of her gut.  She fixed my knee to bend farther forward over my feet, which made my legs shake in delightful convulsions. I'm not the skinny little thing I once was, and so here I am a bit out of the norm here in this crowd and I'm shaking, and struggling through some of these posses, trying to keep up when she accelerates the pace.  It seemed that I was three steps behind, but I did it.

The lessons are free, we are out in nature, and it was a beautiful day I did not my slowness or newness affect me or my mood.  I actually plan to go back and turn my legs to Jell-O again.  I got a beautiful dose of vitamin D and a walk with my friend after yoga.  It was a wonderful day. 

If you have the chance to attend a Yoga in the Park type experience, do it, at least once. She has begun a new thing, Yoga Across America, it is one way to see if three are things popping up in your area.

I will end on this note:

Ride a wild horse
with purple wings
striped yellow and black
except his head
which must be red.
Ride a wild horse
against the sky
hold tight to his wings
before you die
whatever else you leave undone—
once ride a wild horse
into the sun.

Thursday, April 14, 2011

April in all of it's Glory

April is quite a month here isn't it? Just for the Earth day, National Infertility Awareness week & the Light it up blue for Autism recognition alone, but then it hosts Easter and Passover quite often, and then there are the family birthday's and anniversaries, and finally the dreaded tax day. It can get quite exhausting figuring out all of the things to accomplish, celebrate, and campaign for.

I'm quite fond of April, but I'm very glad that we skipped it in choosing our Wedding day, not that we missed it by much getting married in the first week of May, but still it does give us some time to let April's business settle a bit.  I've been seeing post for Autism, and 
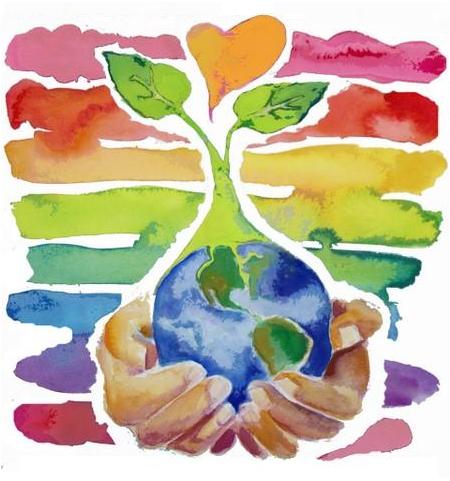
Earth day, but I've got Easter on my brain.  I also want to keep things earth friendly though.  That's why I got kind of excited by an article in Fine Cooking regarding Easter eggs: The Recipe For The Perfect Easter Egg Dye.
Having dealt with beets recently I didn't have to guess to much about all of the natural dyes they suggested, but here are some of the ideas.


How to dye Easter eggs I (Kirsten Whatley) start with fresh, clean, white eggs placed in a stainless steel or enamel pan. You can experiment with brown eggs, but they don’t absorb color as well. Then I add the dyestuff—leaves, flowers, vegetable peelings, spices, roots. I rinse the vegetable matter, especially if it isn’t organic or doesn’t come from my own garden.

Next I add water to cover the eggs and dye materials. I use water slightly warmer than the eggs to reduce the risk of cracking. A little vinegar helps break down components in the eggshell to allow it to absorb the dye better. Slowly, I bring it all to a gentle boil, reduce the heat, and simmer until done, about 15 minutes.

At this point, I’ll either run cold tap water into the pan to stop the cooking, or leave the eggs in the dye bath up to two hours to deepen the shade. This may lead to overcooked but edible eggs, marked by green rings around the yolk. Since I’m concerned with the color of the shell, I feel it’s worth the compromise. I’ll even steep the eggs in their dye water in the refrigerator overnight for still darker hues—a safe alternative to leaving the eggs out at room temperature. Afterwards, I let the eggs air-dry, then polish them. If you plan to eat the eggs, refrigerate them, but if they’re purely decorative, you can leave them out.

This method can be applied to any natural dye source; what differs will be the amount of dyestuff used. For fresh flowers and greens, vegetable peelings, or berries, use 2 cups of material per quart of water; for dried flowers or leaves, 2 tablespoons per cup of water. For ground spices, use 2 teaspoons per cup of water. You can also experiment by substituting pure fruit juices that are rich in color in place of water and other dye materials.

Color and patterns come from the world of nature
Dye sources, and the colors they produceFollowing are the dye sources I’ve found to yield the richest colors. Remember to use only edible plants or portions of plants (no rhubarb leaves, for example).
• Onion skins marbleized oranges and yellows
• Onion skins with unsprayed rose petals peachy hues with green or yellow tints
• Shredded red cabbage midnight blue and teal
• Beet root brown with a purple cast
• Beet tops dove gray
• Spinach pale green
• Carrots yellow with olive overtones
• Carrot tops soft gold
• Blue potatoes muted teal
• Grape juice deep lavender (for a lovely crystallized sugar coating, let the egg dry without rinsing)
• Blueberries (frozen is fine) deep blue
• Raspberries (frozen is fine) light fuchsia
• Blackberries (frozen is fine) plum
• Coffee milk-chocolate brown
• Black tea reddish tan
• Cinnamon subdued mahogany
• Paprika light orange
• Turmeric vivid gold
NOTE: Beware of using cayenne. When it is boiled in water, its vapors permeate the air and can irritate the nose and throat.
Natural egg dyeing, like everything in nature, has its idiosyncrasies. The most obvious is the illusion of color: A plant often looks unlike the color of its dye. Red and white onion skins yield pale apricot hues; green and red beet tops produce a mauve gray. And the color of the dye bath can vary dramatically from the final dye color.

A plant may produce a different dye water when steamed rather than boiled. Add baking soda to the mix and the color will change again. Red cabbage, for instance, yields blue, celery, or teal hues depending on whether you steam the plant first, boil it, or add baking soda. That’s when the lure of experimentation ensnares you, and before long your kitchen takes on the appearance of a chemistry lab.

With natural dyes, the character of each egg emerges through markings on the dyed shell. Some appear mottled or etched like a wild bird’s egg, others absorb the dye in streaked bands. Science attributes these variations to an uneven distribution of calcium in the shell. I prefer the notion that the closer we work with nature, the more our results approximate hers.

Artistic touches
Since there are no wax crayons in the natural world, I’ve turned to the intricate patterns of leaf and flower to design my eggs. By affixing tiny bits of greenery before dyeing, you can create delicate natural stencils. Small, soft flowers and leaves with crisp outlines, like ferns, work best. Experiment, as some materials are too thin to block out the dye, while others are too stiff and may need to be blanched for a short time to soften.

Stick greenery to the egg by wetting it with egg white thinned with water. Then wrap the whole egg, greenery attached, in a square of cheesecloth and secure at the top with string. Follow the same dyeing process as before and rinse before unwrapping. The result is a striking silhouette where the leaf or flower was attached.

One of the most artistic effects is made by wrapping layers of yellow onion skins around the egg. Or first encase the egg in rose petals, then onion skins. Secure it all in cheesecloth and simmer in water (don’t use vinegar with onion skins). This produces a beautiful marbleized appearance. After running out of onions, I’ve been caught rummaging through the produce bins of my local market for extra skins—this is guaranteed to draw curious looks from store clerks.

The appeal of dyeing with natural materials is that you’re free to invent your own rules. Soon you’ll be looking with fresh eyes on every weed, flower, and fern for dye potential. You may even find it in a cup of coffee.

Basic recipe for Easter egg dye
• 6 uncooked eggs
• Dyeing material: berries, vegetable peelings, etc.
• White vinegar
• Water to cover eggs
• Baking soda (optional)
• Vegetable oil (optional)

Place uncooked clean eggs in a pot large enough to accommodate all the ingredients. If using fresh material, add 2 cups per quart of water. For dried flowers and herbs, use 2 Tbs. for every cup of water. For ground spices, 2 tsp. per cup.

Add water slightly warmer than the eggs, one cup at a time, to cover all by 1 in. Add 1 tsp. of vinegar for every cup of water. To change the dye color of most fresh materials, add 1⁄4 tsp. baking soda per cup of water.

Bring water to a gentle boil, then reduce the heat and simmer for about 15 min. When the eggs are done, remove them from the dye bath. For a deeper shade, let them cool in the dye bath or refrigerate to steep overnight.

Air-dry so as not to rub off the dye. For a subtle sheen, polish with vegetable oil.

Marbelizing an egg, using an onion skin dye
Lay a square of cheesecloth flat and cover its surface with the onion skins, so that no fabric shows. (Add a layer of fresh rose petals for a peachy hue.) Place the egg in the center and gather the edges tightly around the egg, securing at the top with string.

Place wrapped eggs in a pan with enough water to cover. The water should be slightly warmer than the eggs. Do not use vinegar with this dye. Bring to a slow and gentle boil. Reduce heat and simmer for 15 min. Remove from heat and let eggs cool in the dye bath for up to 2 hours. Unwrap and gently dry. Try red or white onion skins for a different hue.

Onion-skin dye materials (for a half-dozen eggs)
• 6 white eggs
• Yellow onion skins
• Fresh rose petals (optional)
• Six 7-in. squares of cheesecloth
• Six 4-in. pieces of string
• Water to cover eggs
• Vegetable oil (optional)
Easter egg dyeing #1 Easter egg dyeing #2
1. To create a marbleized look, start with onion skins, cheesecloth, a bit of string, and an egg. 2. Lay the onion skins over the cheesecloth; and place the egg on top.
Easter egg dyeing #3 Easter egg dyeing #4 Easter egg dyeing #5
3. Encase the egg with skins and gather all together in a bundle 4. Boil in the dye bath and remove the bundle when cool. Peel off the onion skins; rinse lightly and dry gently. 5. Peel off the onion skins; rinse lightly and dry gently. For a sheen, polish with vegetable oil.


by Kirsten Whatley April 1998 from issue #14

If you are looking for other things to do to create fun green Easter Ideas.

Sunny Easter Menu

This brunch menu is designed for Easter al fresco, but can be enjoyed just as thoroughly indoors.

Sunny Easter Menu:
 Grilled Wild Salmon and Vegetables
 Ham and Asparagus Frittata
 Herbed Potato Salad
 Fresh Berry Pavlovas
Finecooking.com: Easter recipes

Martha Stewart: Natural Egg Dyeing Techniques

Five Ecofriendly Easter Crafts

Easter Symbols

I'm not a mother, so the egg thing is not a requirement in our house, but I am an auntie and I like to do things with my niece who is close by, and if i were close to my other niece and nephew we would definitely be decorating some eggs together. I'm sure if you think about it, mother or not, there are kids in your churches and classrooms and family members who can use the more green ideas to celebrate.

For More information on all things regarding Autism go to Speaking on the Spectrum.

Earth day has some other considerations regarding fertility and health for our whole planet Check out the InCyst post Healthy for the Planet...Healthy for your Hormones

Now, remember to keep things hormone friendly, the Easter bunny did have it's origins as a symbol of fertility and we want to keep it that way.

Wednesday, April 13, 2011

What to do with a pantry of odds and ends and a box of Veggies

Chia Seeds in Lemonade - not a favorite way to get Omega 3

Cooking Light

Tomato Basil soup

Spicy Black Bean cakes with Spicy Sour Cream

Beat Chips - a bit more burnt than anything

Orange glazed Salmon with Asparagus and Jasmine rice

Salad with Broccoli, radishes, oranges, & black beans

Corn tortillas with black beans and rice

Tomato Basil soup & a grilled cheese sandwich


March was a tight month, we've been living like kings on beans and rice.  I'm pretty sure that my first menu did not give away our precarious position (Pork with Swiss chard, Orange Roughy with Fennel, Red Beans & rice with chicken, Spaghetti, and red bean soup).  The difficulty came when I ran out of diced tomatoes, rice, sugar, vanilla, and chicken.  These things are integral to many of the dishes I make, and so I was very glad when we were able to get to Costco to replenish these supplies.

It is precisely for moments like these that I like to have a closet filled with non-perishable goodies, and a freezer filled with meat & veggies. I'm very fond of dried beans now, they last forever, and are cheaper than canned beans, and do not have the Issue with BPA being in the cans since they are dried.  I'll post more on them later. 

I have to mention this, since I do have a picture of my meal with asparagus posted.  I'm not a fan of this particular veggie, my family grew them in our back yard and they became more of a weed than anything else.  My mom seemed to pick them when they were smaller, darker, and softer or she just cooked them until they were mush.  Green mush covered in a sort of cheese sauce, eww.  I'm slowly learning to appreciate the bright green crunchy delight that this veggie can be, and I'm thinking it was worth keeping them a part of my delivery.  I cooked them on the stove, but took them off and put them in an ice bath once I thought they might over cook.  It kept them bright green, and they kept that snap to them.  It also helped that when I melted the cheese over them it did not make them go soft but just warmed them back up.

Tuesday, April 12, 2011

Cardio Cabaret, Burlesque Style [1/3] - Yoga Booty Ballet Live


Here is part one of three parts to this video. I found it on YouTube of course. This is one of my favorite work outs, it's not to high impact on the Cardio, but it's fun and sassy. Everyone has different levels that they begin at, and progress to and everyone is motivated by different things. These two motivate me, and I like that. Yoga Booty Ballet can be purchased through Beachbody.com, and through Amazon, amoung other sites on the internet.

Find the things that motivate you, and embrace them. 

My third Delivery - Mixed Fruits & Veggies box


Regular
4 Apples, Pink ladies
2 Oranges, Navel
1 box of Strawberries
2 Oranges, Cara Cara
1 Broccoli Bunch
.75lb Asparagus
1 bunch Beets, red
1 ct Radishes
1 bunch Red Chard
1 bunch Leaf Lettuce


Shaved Asparagus Pizza

Ingredients
  • 1 recipe for your favorite pizza dough
  • 3/4 lb (s) asparagus
  • 1/4 cup grated Parmesan
  • 1/2 lb (s) mozzarella, shredded or cut into small cubes
  • 2 tsp olive oil
  • 1/2 tsp coarse salt
  • several grinds black pepper
  • 1 scallion, thinly sliced

Instructions
Preheat your oven to the hottest temperature it goes, or about 500 in most cases. If you use a pizza stone, have it in there. Prepare asparagus: Use ends as your “handles” as you peel the asparagus. Holding a single asparagus spear by its tough end, lay it flat on a cutting board and using a vegetable peeler, create long shavings of asparagus by drawing the peeler from the base to the top of the stalk. Repeat with remaining stalks and don’t fret some pieces are unevenly thick. Discard tough ends. Toss peelings with olive oil, salt and pepper in a bowl. Assemble and bake pizza: Roll or stretch out your pizza dough to a 12-inch round. Sprinkle pizza dough with Parmesan, then mozzarella. Pile asparagus on top. Bake pizza for 10 to 15 minutes, or until edges are browned, the cheese is bubbly and the asparagus might be lightly charred. Remove from the oven and immediately sprinkle with scallions, then slice and eat.
Serves: 4
Difficulty: Medium


Raw Beet Salad


Ingredients
  • 1 bunch beets, raw
  • 1 shallot (large)
  • salt and freshly ground pepper
  • 2 tsp Dijon mustard (or to taste)
  • 1 Tbs extra virgin olive oil
  • 2 tbs sherry vinegar or other good, strong vinegar
  • minced parsley, dill, chervil, rosemary or tarragon

Instructions
Peel the beets and the shallot. Combine them in the bowl of a food processor fitted with the metal blade, and pulse carefully until the beets are shredded; do not purée. (Or grate the beets by hand and mince the shallots; combine.) Scrape into a bowl. Toss with the salt, pepper, mustard, oil and vinegar. Taste, and adjust seasoning. Toss in the herbs, and serve.
Serves 4.
Difficulty: Easy

These are the recipes that came with the box, I'm not sure if I will try them or not.  The other recipes they sent were only, okay, and I have not come to trust the like I do Cooking Light, or other recipe sources.

But these are the veggies I have to work with until after we pay rent, and get paid again, or until my next box arrives.  It's an interesting plan that I have going right now.  I'm glad that I have the rice and beans to use.

So now I've pulled out my favorite resources to figure these mysteries out. Way To Cook, The Vegetable bible, Deceptively Delicious, and now Julia Child's Master The Art of French Cooking.
Since I have not gone to culinary school, I rely on these forms of instruction.

Monday, April 11, 2011

Deodorant - another use for Coconut Oil

Home Made Coconut Deodorant From Antika Moda, by way of Another Recipe Blog

Ingredients:
5-6 tablespoons of pure coconut oil (found at any health food store)
¼ cup baking soda
¼ cup corn starch

Instructions:
1. Mix all 3 ingredients well until it’s the consistency of a soft deodorant bar
2. I put this mixture into an old deodorant container for easy use, but you can store it however you choose
3. Rub a small amount onto (clean!) underarms

It lasts all day, smells fresh (faintly of coconut), and keeps you dry!
The cool thing about this mixture is that each ingredient has a purpose:
Coconut oil kills bacteria
Baking soda is a deodorizer
Corn starch absorbs wetness
(For Men and Women)


Because I like fun containers, here is a link to view some you can purchase.
Elements Bath and Body.com - Natural Twist up Tube


Other suppliers:
Camdengrey.com - essential-oils Tubes & Roll-Ons

more of bottles than traditional deodorant containers:
SpecialtyBottle.com


At the beginning of the year, there were those who were talking about reducing their intake and use of additives and using products that were not natural.
Cleaning supplies, make-up, things that don't get all the same attention since they are not as sexy and fun to talk about as food and exercise.  But these things do clutter us up.


Note:
having made this in the summer I would suggest that you use the least amount of coconut oil, and if your coconut oil is runny in the jar, it will be runny in deodorant.  Summer's here are quite warm, and my coconut oil is not solid, so the deodorant will be used this fall and winter.
Related Posts Plugin for WordPress, Blogger...